 Loading... Please wait...
Sign up for our newsletter
You can also follow us on twitter.
Our Newsletter
Tutorial: How to MIDI Map VMeter as CrossFader & VU Meter in Torq DJ Software
This tutorial will show how to setup the VMeter MIDI connections inside Torq DJ software. We'll show how to turn a VMeter into a volume control and VU meter, and also how to map two outputs on a single VMeter at once: pressure and cross-fader position.
We're basically going to set up two of the 3 VMeters in this video:
Note: Some programs seem to have difficulty discriminating between multiple VMeters on Windows 7, Torq included. The latest firmware version changes the USB device name when you change the channel. Be sure to get the latest config utility, also.
Also Note: this tutorial is being done with Windows 7.
On macs, it seems that you can remove and plug back in a VMeter without much trouble, whereas on Windows, you need to re-detect or restart the program.
We're going to use one VMeter in its out-of-the-box config, and another with pressure output and crossfader mode enabled.
Configuring one VMeter for CrossFader and Pressure Output:
- First, plug in just one VMeter and open the config utility. This involves starting Max Runtime, and then opening the config .maxpatch file.
- Click the connect button
- Make sure the VMeter was detected (the version number and button by 2 should show up).
- Click Retrieve settings to make sure we know what's already programmed.
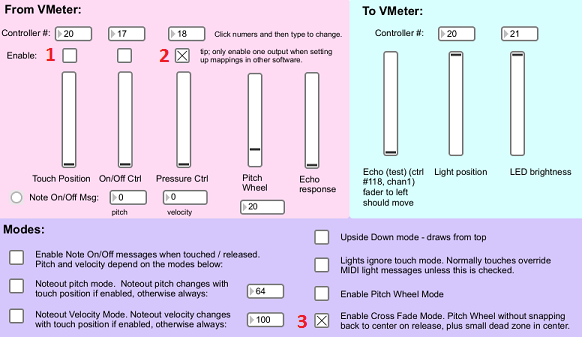
- Now turn off position output, and turn on pressure output and cross-fader mode:
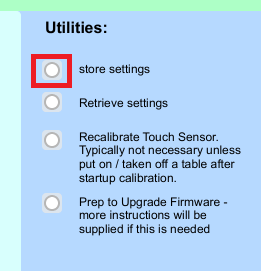
- Finally, click "store settings" so the settings will be retained after unplugging the vMeter.

- Now quit the config utility, and plug in the 2nd VMeter. (You may also need to configure it back to the default settings if they've been changed).
CrossFader and Master Volume Input:
- At this point, you should have both VMeters plugged in, no other applications talking to them (Max/MSP & config utility should be closed), and one of them configured for crossfader and pressure output, the other just position output.
- Open up Torq, and go into the settings by clicking the gear at the top right:

- One strange issue with Torq is that it doesn't seem to recognize multiple VMeters until you deactivate and reactivate them in the settings. This most likely has to do with Torq's handling of multiple devices with the same name.
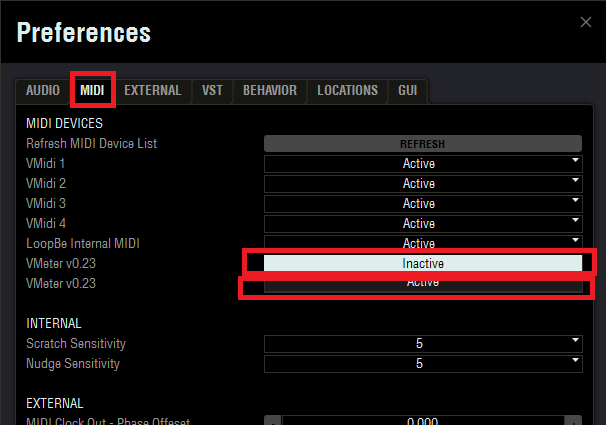
- Go to the MIDI tab, and then for each VMeter, click to set it inactive, and active again.
- Now exit the preferences.
- We're going to map the cross-fader to one VMeter and the main volume to the other.
- Right click on the cross-fader first so it turns red:

- Now touch the cross fader VMeter. The red block should dissappear and the VMeter should now control the fader.
- Next repeat the procedure with the main volume and the 2nd VMeter:
Configuring VU Meter output:
- Go back into the preferences with the gear button in the top right again.

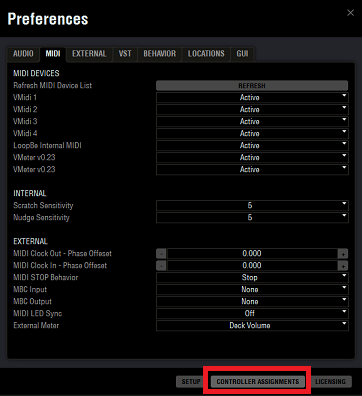
- Click the Controller Assignments button at the bottom:

- Select the first VMeter from the Device drop down menu:
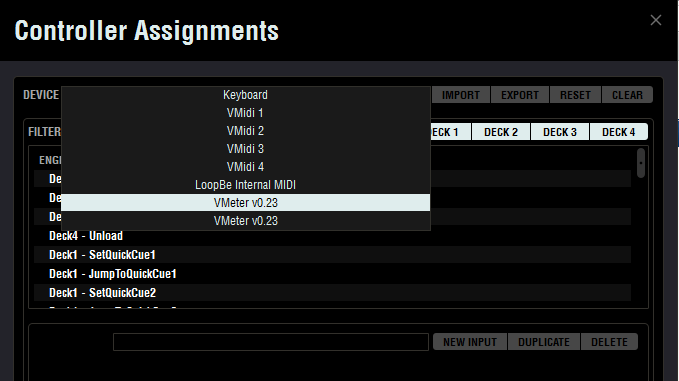
- In the next screen should either see "Master - MasterVolume" or "Master - Crossfader" depending on which VMeter is which. If you get the cross fader one, switch to the MasterVolume one with the same Device drop down menu.
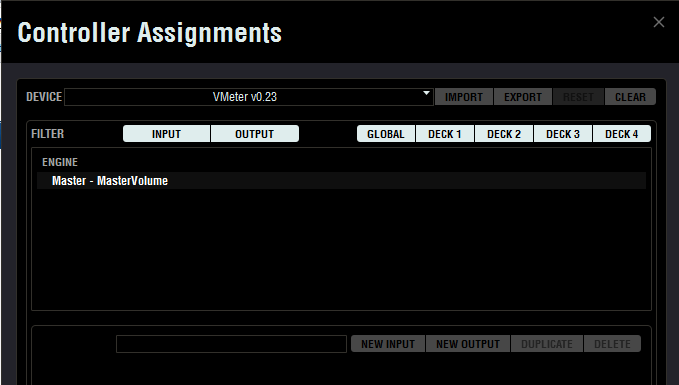
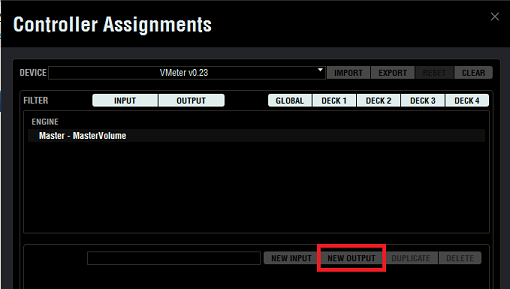
- Now choose New Output:
- Click on the path to choose the functionality:
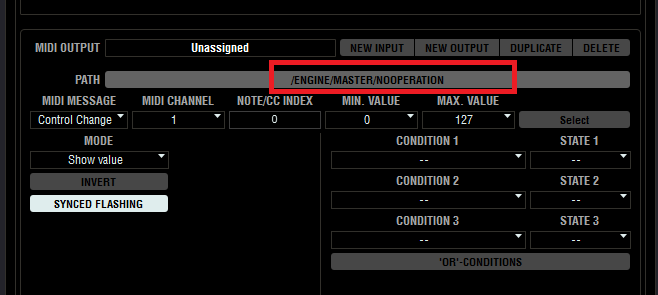
- Navigate to and choose MasterMeter: (Engine -> Master -> Mixer -> MasterMeter)
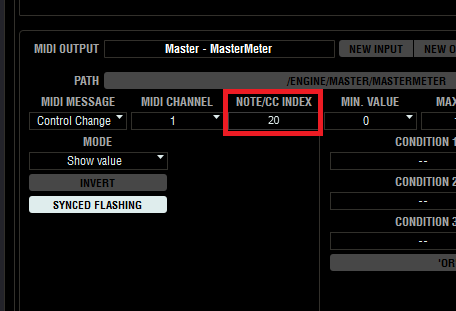
- Change the Note/CC Index to 20: (the default light controller number for the VMeter):

- Exit out of all the preferences windows and load up some sounds. You should now see a VU Meter showing the overall volume on the VMeter, and be able to control the master volume by touching the strip.
CrossFader Output Display:
- We're now going to tweak how the crossfader works, to show the position of the crossfader if you change it with the mouse.
- Go back into the Controller Assignments (Gear to preferences --> Controller Assignments button at bottom).
- Choose the other VMeter this time from the Device drop down menu (the crossfader one).
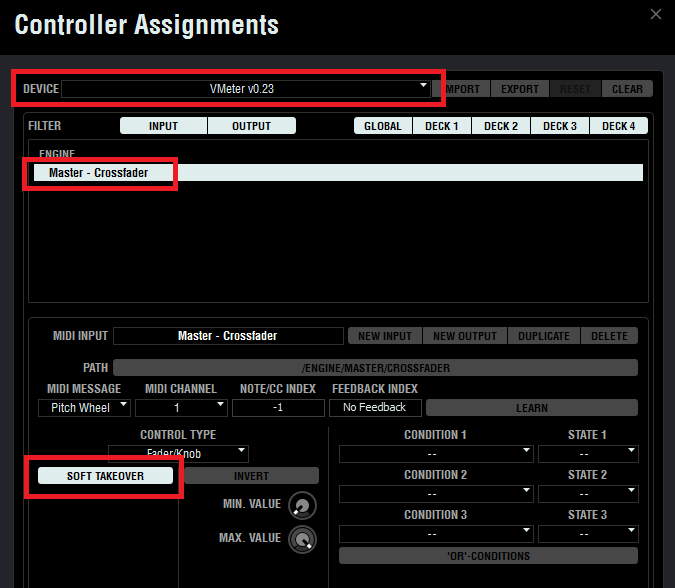
- Choose the Master - CrossFader, and the turn OFF "Soft Takeover." Soft taker is the default setting because Torq assumes you're using a physical slider that can't react to mouse touches. If you were to move a physical slider, and then make a change with the mouse, the phyiscal position wouldn't match the screen position. And when you touch the physical slider, it would suddenly jump. Soft takeover mode doesn't let the screen position move until the physical position matches it. All that being said, we don't need it with the VMeter!

- Now add a new output to show the position of the cross fader when you move it with the mouse
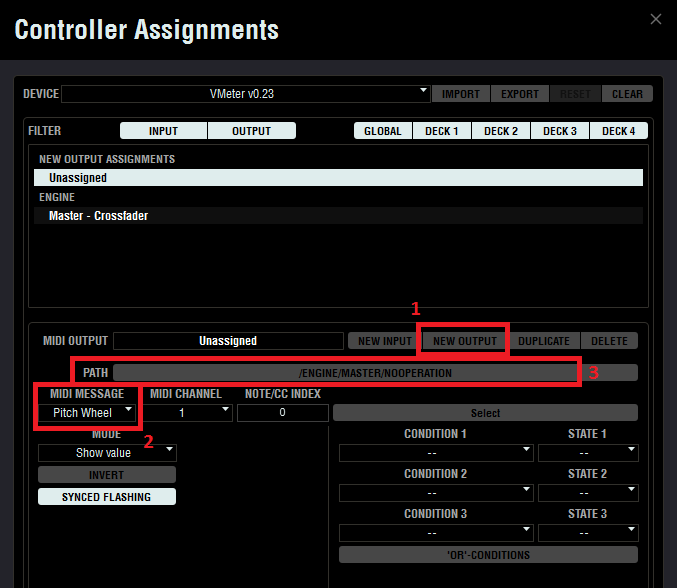
- Then change the MIDI message to Pitch Wheel, and click the Path to select the crossfader output functionality.
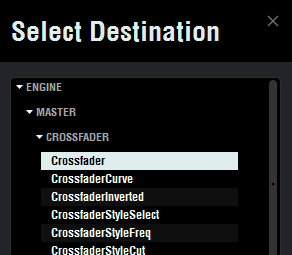
- Choose the Crossfader in (Engine -> Master -> Crossfader -> Crossfader) and click apply.
- Exit out of all the preferences and test to make sure moving the mouse changes the lights on the VMeter.
Effect Parameter Control via Pressure:
- To map an effect to pressure, first setup an effect.
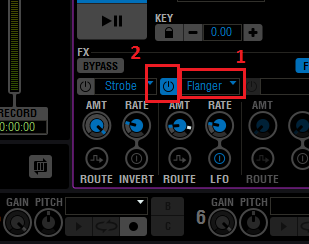
- Select Flange from the effect drop down (1), enable the effect (2)
- Because the VMeter's touch strip is already mapped to the cross fader, if we try to right-click map the the effect, it will erase the crossfader mapping, so we need to go back into the Controller Assignments through preferences.
- Select the VMeter from the Device drop down menu that has the Crossfader mappings, and then choose New Input.
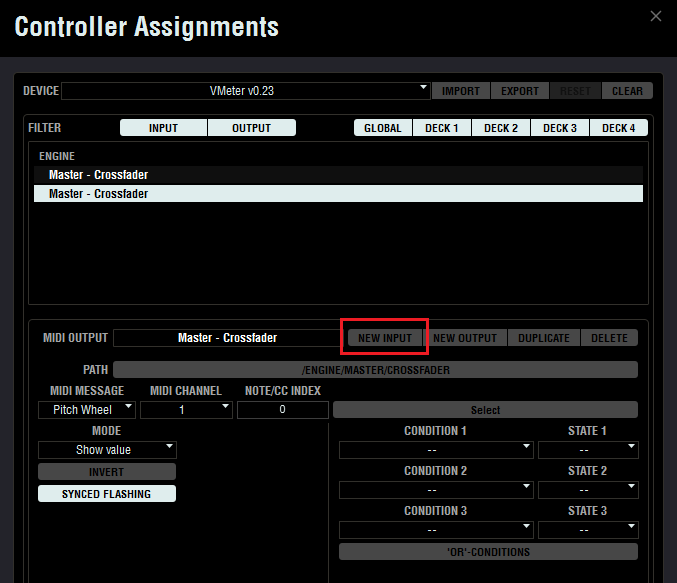
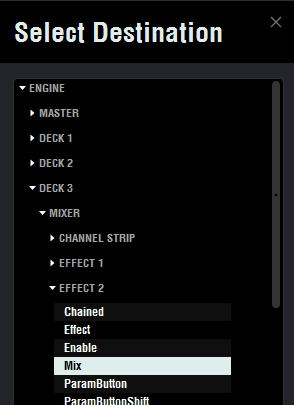
- Then click on the PATH and select the effect Mix parameter:
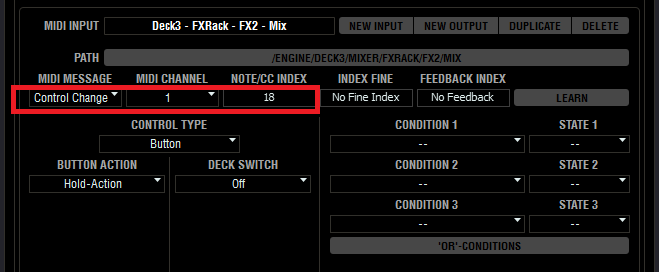
- Finally, configure the MIDI controls:
- Exit out of the preferences, and try pushing on the crossfader VMeter. The AMT knob on the Flanger should move with pressure. Note that on the VMeter, pressure is measured by surface area, so two light touches by two fingers will be the same as one heavy touch by a single finger.
Saving (exporting) MIDI Controller Mappings:
- As we mentioned at the top, there are some issues with Torq handling multiple MIDI devices of the same name, so you'll probably want to save off the mappings in case something happens.
- Go back into the MIDI Controller Assignments, and select one of the VMeter devices.
- Click the export button to save off that VMeter's mappings:

- Now repeat this for the other VMeter.
- If the mappings get messed up, you can go back into page and click IMPORT to restore the mappings.

