 Loading... Please wait...
Sign up for our newsletter
Please note we're currently out of production. If we get enough interest, we may do a crowd sale supported run in the future. Let us know if you're interested!
You can also follow us on twitter.
You can also follow us on twitter.
Our Newsletter
VMeter MIDI Controller Pitch Wheel Setup Presonus Studio One
This tutorial will walk through how to setup one VMeter as a pitch wheel input for a virtual instrument in Presonus's Studio One. We're using the free version of Studio One on Windows 7 64bit.
- First, open the free Max Runtime and VMeter config utility, and set up your VMeter as a pitch wheel controller:
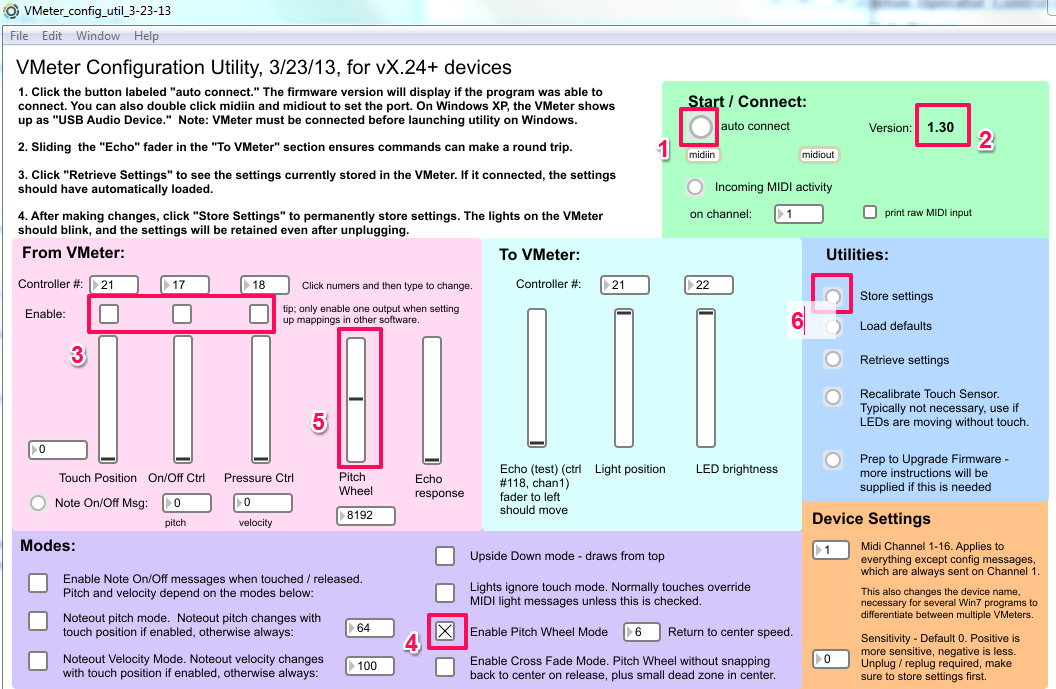
1) Click the "auto connect" button and 2) ensure the VMeter was detected.
3) Disable any of the position, pressure and on/off controller outputs
4) Enable the pitch wheel output and 5) ensure that you see pitch commands coming in on the Pitch Wheel input display.
6) Store the settings so the VMeter remembers them after you unplug it. - Now close Max/MSP and open Studio One.
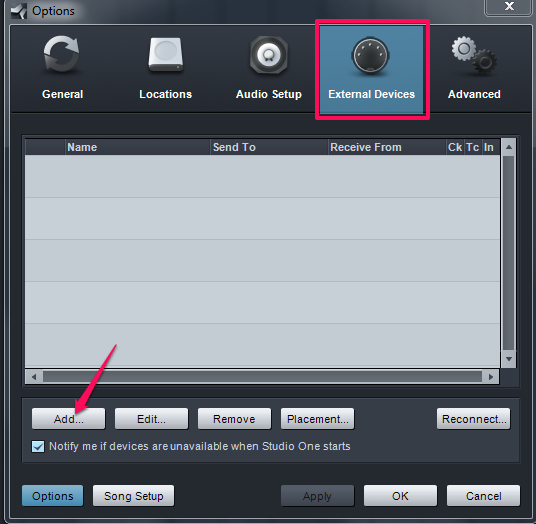
Note: on windows, only one program can talk to a VMeter at once. Multiple VMeters can work with one program, but only one program. We're going to start a brand new song. - First, go to Studio One (top bar menu) --> Options..., select the External Devices tab, and click "add..."
- Now select "Keyboard", type in a name like VMeter for the Device Name, and set "Receive From" and "Send To" both to the VMeter. In Studio One, "Keyboard" is used for any generic MIDI controller, even if it doesn't have keys!
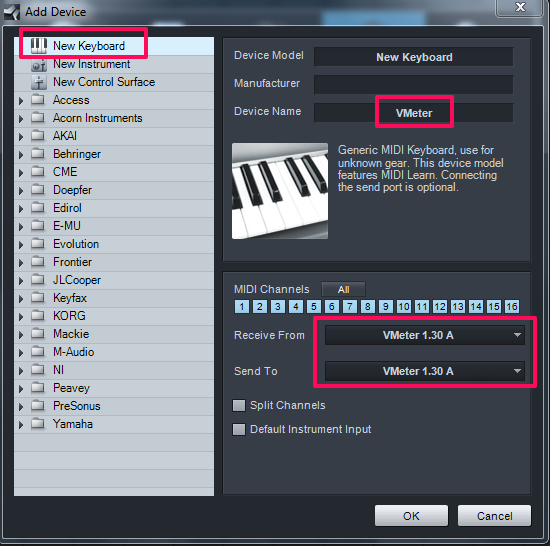
- Click OK.
- I also added a Qwerty keyboard input to help test out the system. You can do this by choosing "Add..." again, and then selecting Qwerty keyboard from the "Presonus" menu.
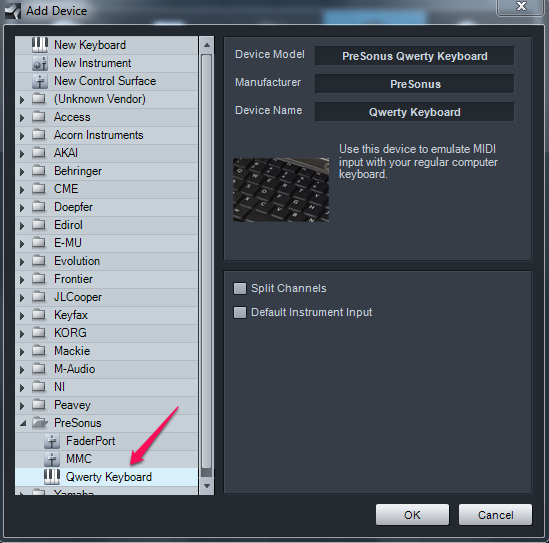
The final External Devices list looks like this: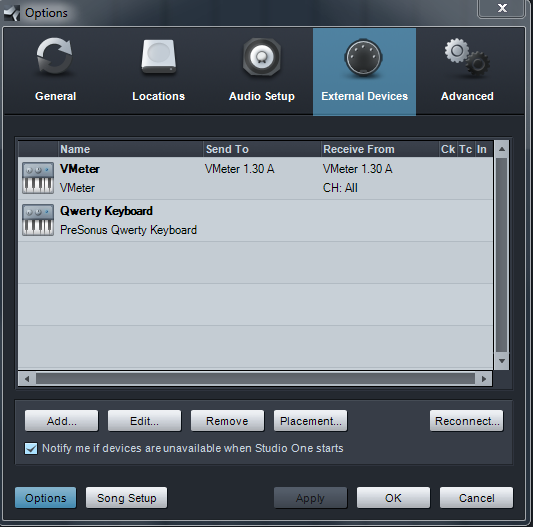
- Now Click OK to close the Options dialog.
- Add an Instrument Track by selecting "Track" (top bar menu) --> "Add Instrument Track"
- Add the Presence instrument by navigating to the Instruments browser (View top bar menu --> Browser --> PreSonus)
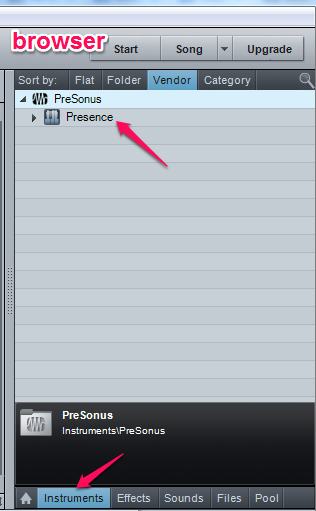
- Drag the Presence instrument onto the track we created.

- Choose a Presence preset to hear some sounds.
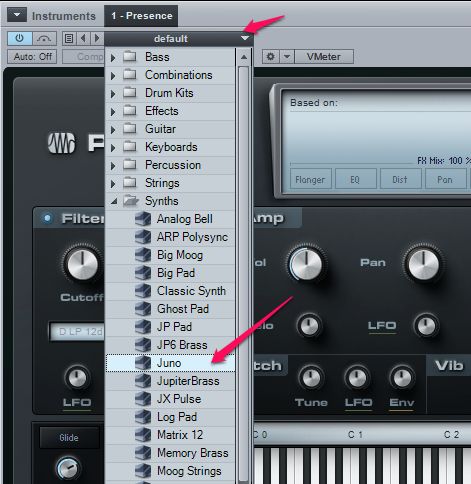
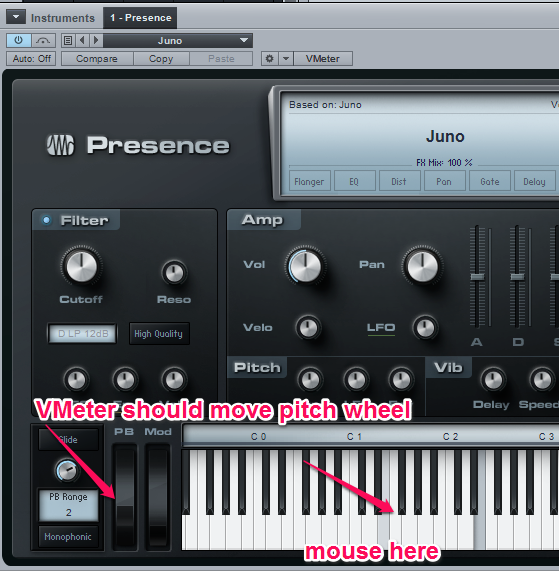
- Now you should be able to click on the keys with your mouse and hear sounds, and also pitch shift the sound with your VMeter.
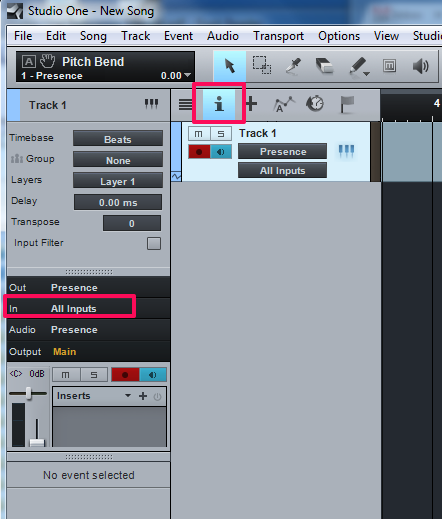
- If you go back to the track, by default it accepts any inputs, but you can also restrict it to just the VMeter.
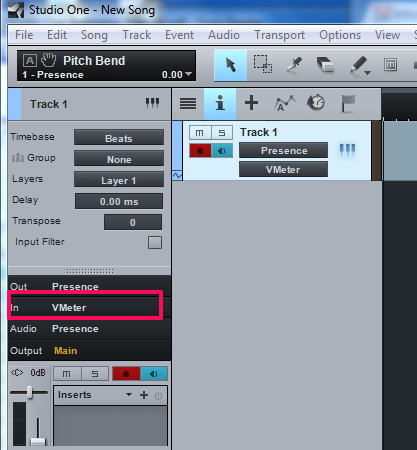
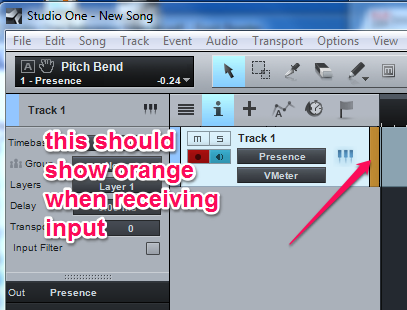
- The input indicator should flash orange when correctly receiving input
