 Loading... Please wait...
Sign up for our newsletter
You can also follow us on twitter.
Our Newsletter
Multiple VMeter MIDI Controller Setup Tutorial in Traktor
This tutorial will walk through setting up 3 VMeters to act as Deck Meter displays, deck volume controls via position input, Cross Fader / X-Fader control, and filter and tempo bend via pressure input. This tutorial is demonstrated on a mac.
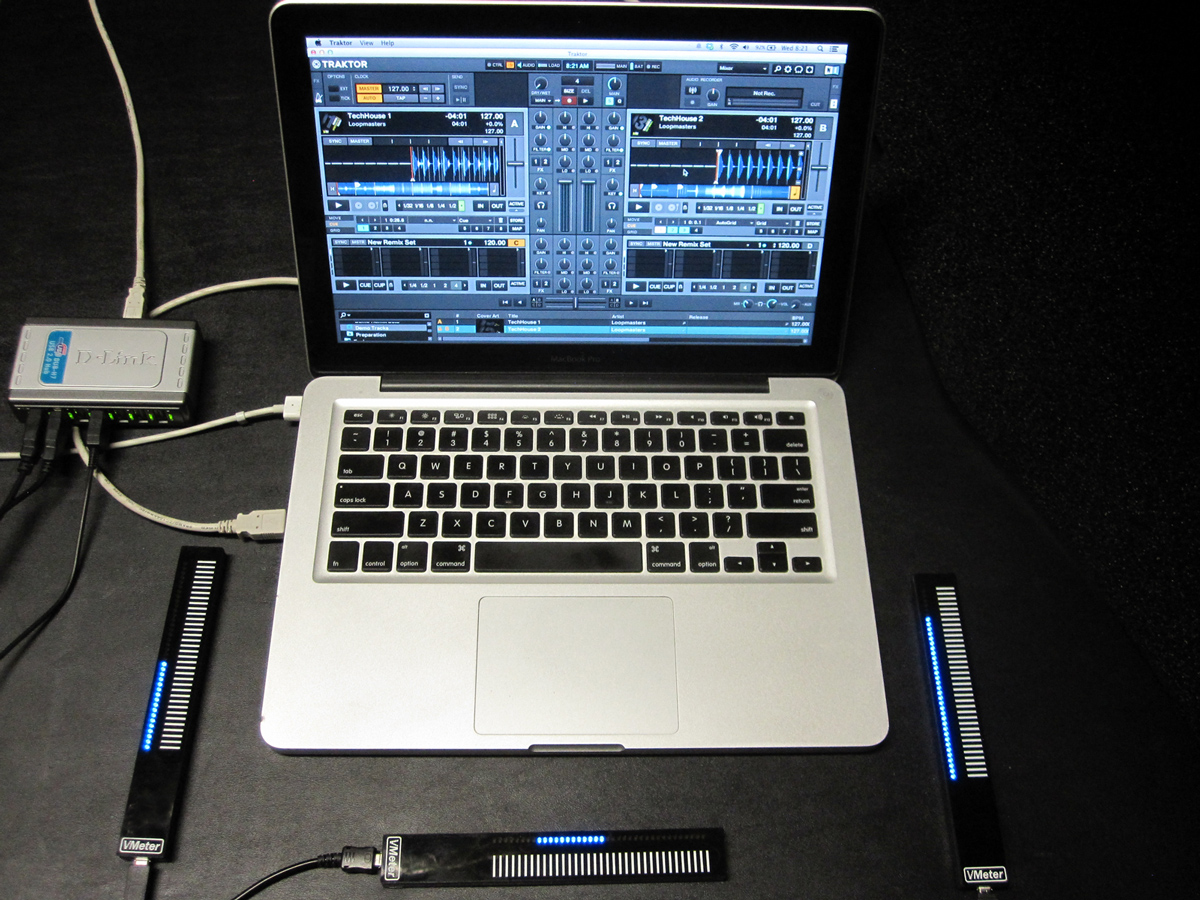
As shown in the picture, VMeter A (on left) will show a Deck Post-Fader Level Meter, control "Volume Adjust" via position input, and Deck A's "Filter Adjust" via pressure.
VMeter C (in middle) will control the X-Fader via position and tempo bend via pressure.
VMeter B (on right) will control Deck B's Volume and show its Post-Fader Level Meter.
- To being, configure each VMeter in the VMeter config utility using the forever free Max Runtime program. Note that only one VMeter should be plugged in at a time while changing its settings.
Set VMeter A to be on channel 1, with position and pressure output enabled on the controller numbers shown. Make sure the Light position controller number in the "To VMeter" box is also set to controller number 20:
Set VMeter B up similarly to A, but no pressure input will be used, and the channel should be 2:
VMeter C will be our cross-fader, so disable the position output, and enable the cross fader mode. Also set the channel to 3 and enable pressure output.
Be sure to click "store settings" for all the VMeters so they will remember the settings after you unplug them.
Now we will configure each VMeter in Tracktor. - Inside Traktor, open the preferences and go to the Controller Manager. Select "Add" and then "Generic MIDI"
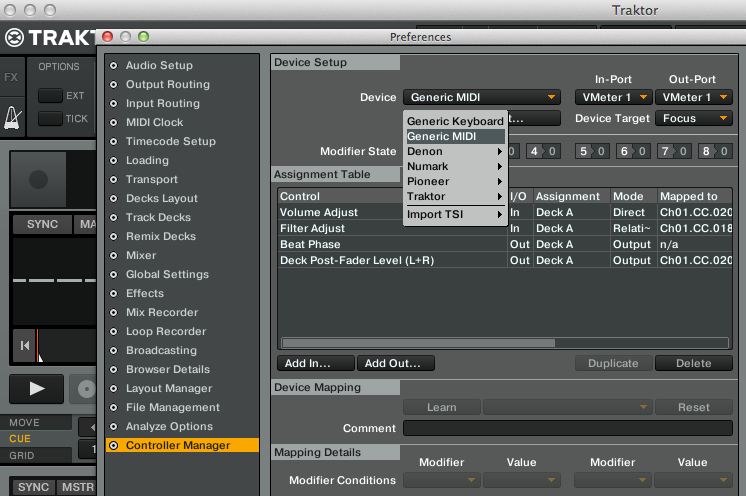
Set both the Input and Output port to VMeter A. Note: the MIDI channel is what changes the letter of VMeter. Channel 1 = A, channel 2 = B, etc. However, sometimes a computer will store the original device name even after you change the channel, so you may need to go into Audio MIDI Setup (on Mac) and delete the device and then plug it in again for the name to change.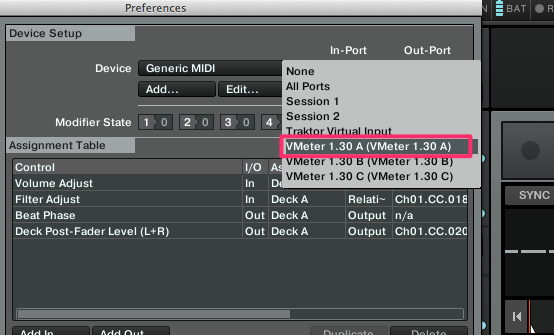
- To control Deck A's volume, click "Add In..." Mixer --> Volume Adjust.
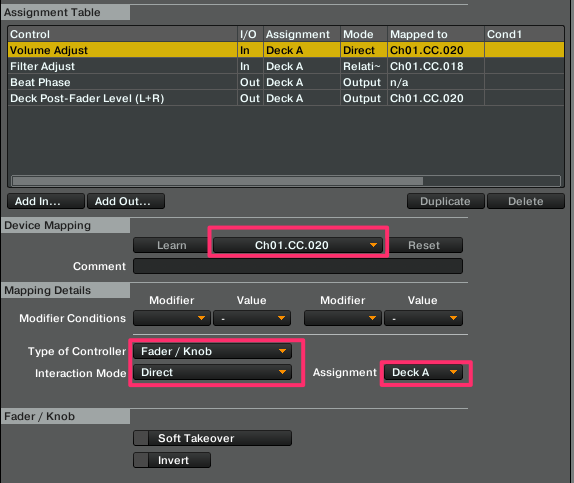
Set the MIDI channel and controller number to 1: CC 20, type to fader, and Assignment to Deck A as shown. You may also want to enable soft takeover so that the volume adjusts relative to where you move your finger instead of jumping directly to your finger's location. - Now we're going to add pressure control over the filter. Click "Add in..." again and choose Mixer --> Filter Adjust...
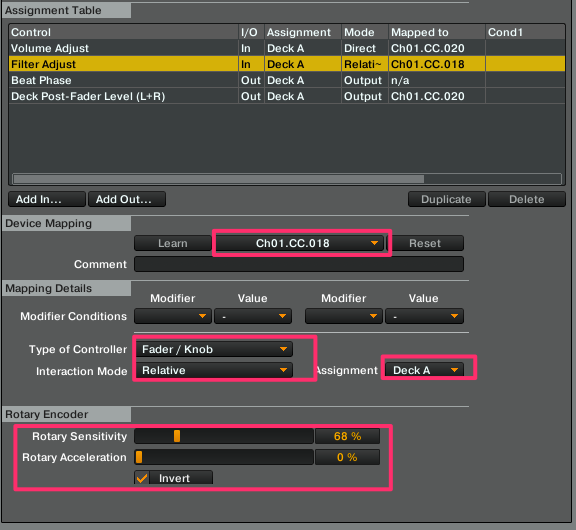
Set the controller number to 18 this time, set assignment to deck A, and be sure to set interaction mode to Relative, and adjust the sensitivity and invert option as shown. The VMeter outputs 0-127 based on pressure, but we really want about 64-10 to correctly add a low pass filter only when the VMeter is pressed. - Finally, we'll setup the Metering output. Select "Add out..." and choose Mixer --> Meters --> Deck Post-Fader Level (L+R).
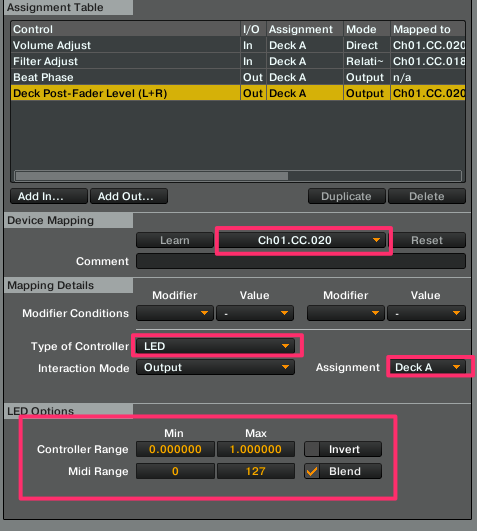
Set the controller number to 20 as this is what will control the LEDs and deck assignment. Everything else should be default. - As an alternative to the metering output, you can also use the Beat Phase to see the tempo displayed. This option is shown below:
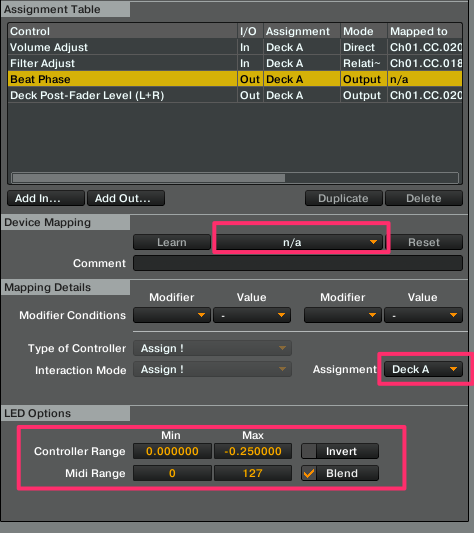
Notice I don't have the device mapped since I don't want to override the metering output. Also, note the controller range settings. Changing these will change what lights are are during what point in the beat phase. The settings above should have the LEDs peaking near the beat onset. - Once you have VMeter A setup, repeat most of the above for VMeter B, accept we're only going to have a meter output and volume control input, no pressure input. Be sure to set the MIDI channel to 2 for all the settings.
Meter output for Deck B and VMeter B:
Volume control input:
- Finally we'll setup VMeter C as a cross fader.
Add another Generic MIDI Device and set the Input and Output ports again to VMeter C. Then select Mixier --> Cross-Fader --> Position.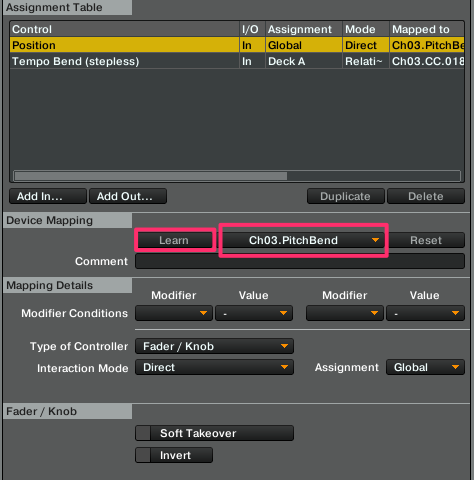
Set the MIDI control to Channel 3 and pitch bend (the cross-fader output of the VMeter). When VMeter is in cross-fader mode, it automatically adds a little dead space in the center to make it easy to perfectly center the control. You may be able to use the "Learn" function, but this doesn't always work when you have both pressure and position output enabled on a VMeter. - Set the tempo bend to respond to the cross-fader pressure:
Choose "Add In..." --> Deck Common --> Tempo Bend.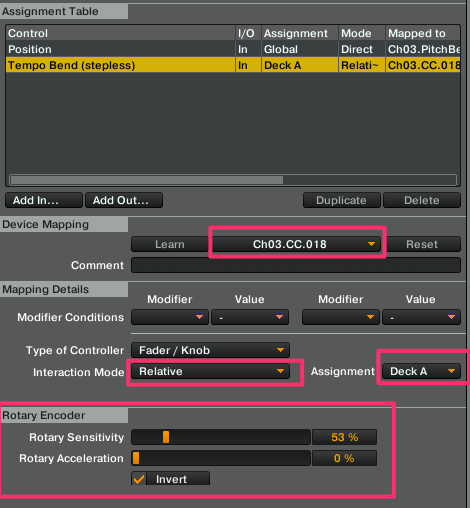
I set it up just to control Deck A, and also adjusted the Rotary Encoder settings to that not touching the VMeter would have no effect on the tempo. Note that to use this along with the cross-fader, you have to very lightly touch the VMeter when only changing the x-fade levels to avoid messing up the tempo!

