 Loading... Please wait...
Sign up for our newsletter
You can also follow us on twitter.
Our Newsletter
Ableton Operator Control with VMeter Pressure & Position Mapping
This tutorial will show how to use the Pressure and Position output of the VMeter to control decay and filter frequency on Ableton Live's Operator instrument.
Live makes it a little challenging to map MIDI CC inputs when two CC numbers are broadcasting simultaneously, especially for the VMeter, which can have 4 outputs all firing at once--position. pressure, on/off and pitch wheel.
The general solution sadly involves configuring the VMeter to have only one output on, setting the mapping in Live, and then repeating for the other outputs. On Windows, this is especially painful since you need to completely quit and restart Live and the VMeter config utility repeatedly (only one program can access a USB MIDI device at a time in Windows).
However, if you only want to map Pressure and Position, you can avoid restarting with the trick shown below (in short, exit mapping mode while your finger's still on the VMeter).
- The final ableton patch (the tutorial starts from scratch). Pizmidi Audio-to-CC VST instrument (get the Win32 one even if you're on 64bit) package needed to display track volume as LED brightness.
- Start by setting up the VMeter outputs in the config utility. In Windows, make sure no other program is using the VMeter. Only one program at a time can access a USB MIDI device, and the device must be plugged in before the program launches.
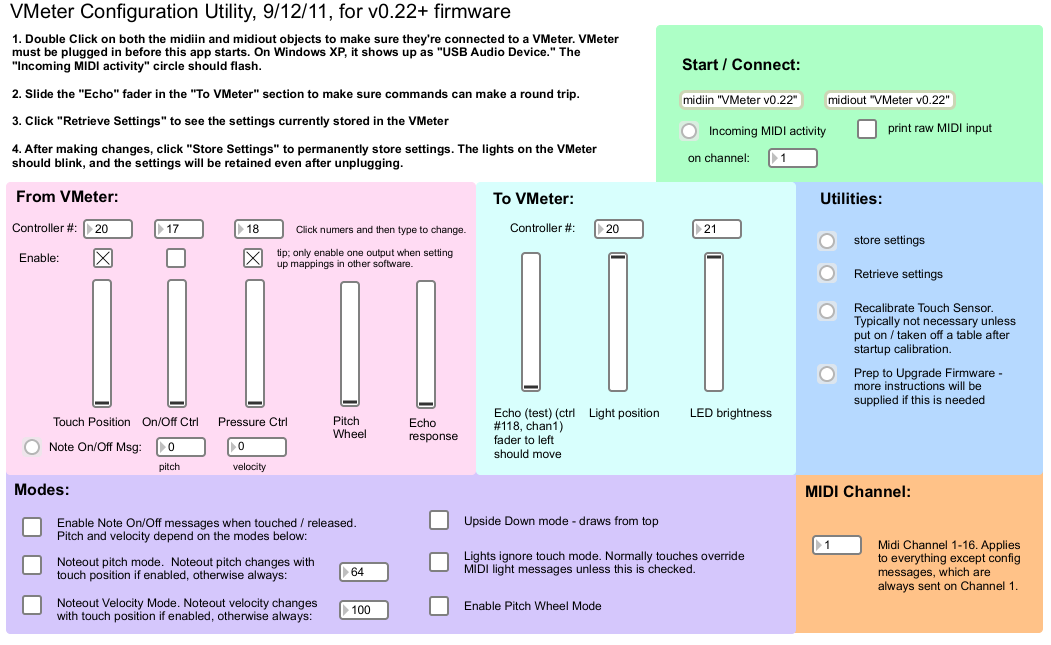
- Follow the normal steps listed in the config utility:
- Double Click both the midiin and midiout boxes to connect to the VMeter.
- Make sure it's connected by moving the Echo slider.
- Click "Retrieve Settings" in the Utility panel to see what's currently stored.
- Adjust the settings to match the above picture. Make sure Pressure output is on, and the LED Brightness is set to CC 21.
- Finally, click "Store Settings" to make sure the settings are retained after the VMeter is unplugged.
- Now open Live (make sure the VMeter Config Utility is closed first!)
-
- Make sure, at a minimum, the Remote column is On for the VMeter input and Track is On for the VMeter Output.
- While you're there, also change the take-over mode to "None." The other settins apply to hardware sliders that can't immediately jump to a new displayed value like the VMeter's LEDs can.
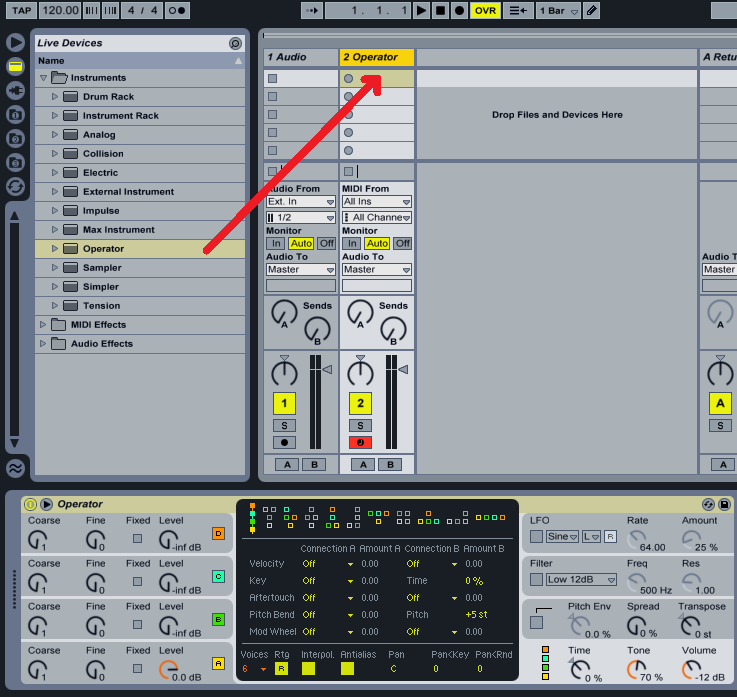
- Now add an Operator to a MIDI track.
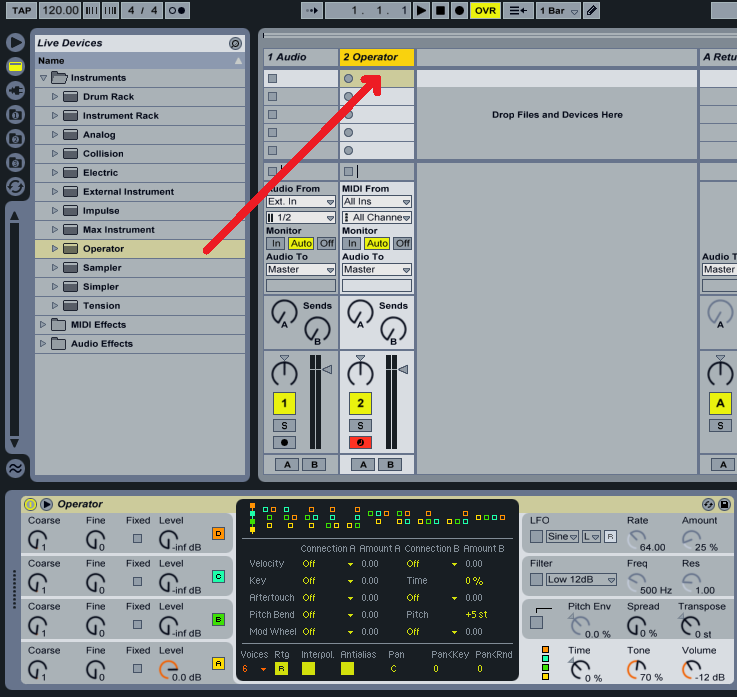
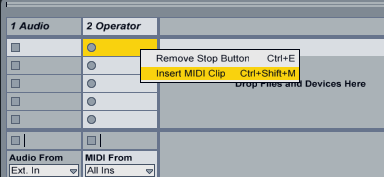
- Now we need to add some notes. Right click on the first open Clip Slot and choose "Insert MIDI Clip."
- Add some notes. To make the pattern shown below, right click to change the quantization to 1/32 and press Ctrl+B to switch to draw mode.
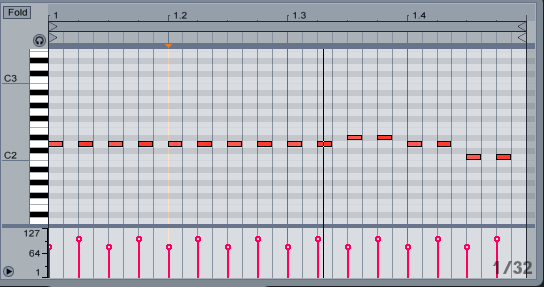
- Now if you hit the Clip Launch Button, you can have something playing while we change the parameters.
- Press Shift+Tab to go back to the operator device.
- Turn the volume up on all 4 oscillators, and also turn on the Filter.

- Now we're ready to map the VMeter. First we'll connect the VMeter's position output to the Filter cutoff frequency.
- Click the MIDI button in the upper right to enter mapping mode, then click the Freq knob in the filter area.

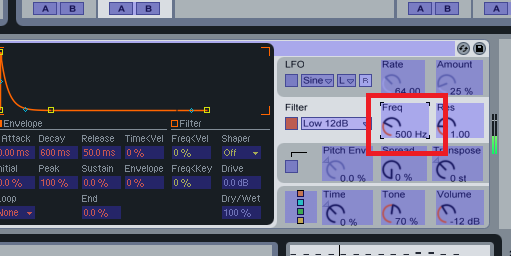
- Finally, touch the VMeter to map the position controller output.
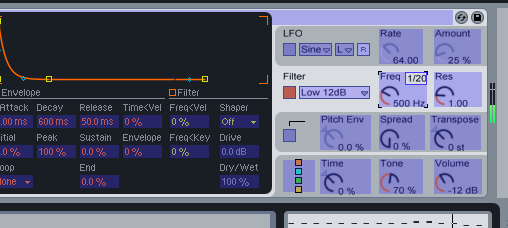
- You should see 1/20 in the upper right.
- To map the Pressure output of the VMeter, first click somewhere in the gray area surrounding the yellow "A" on the left side of the Operator (but the the A itself). The A osscilator panel should show up.
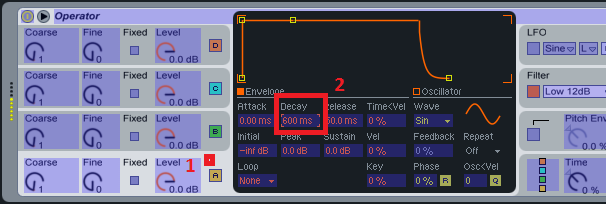
- Now comes the tricky part. If you simply touch the VMeter, it will be set to the position controller (1/20) when you release since the VMeter sends a message out the position output after the pressure output. To lock in the pressure out, which is controller number 18, touch and hold on the VMeter, and exit the MIDI mapping mode while you're holding down.
- Now if you press down on the VMeter, you should see the Decay change. The sound won't change quite yet...
- Change the Sustain level to -15 by click on it and typing -15, and then hitting enter. The Operator should sound different as your press and slide along it now.
- To amplify the effect, repeat the same mapping on Oscillator B's decay parameter. Set it's sustain to -27.
- If you now go back into the MIDI mapper mode, and look at the listing on the left, you can fine-tune the mappings.
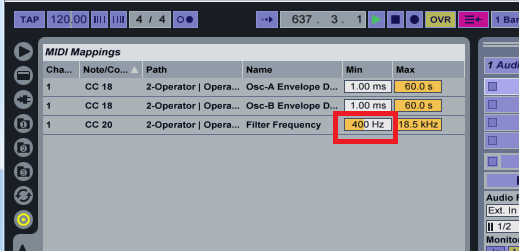
- You can also right click and invert the mapping, too.
- In the video, a Saturator and "Dark Hall" reverb were added to enhance the sound. Check out the full Live set to see those settings if you're interested.
- Finally, if you want the brightness of the LEDs to respond to the track's volume, see our volume display tutorial. Note that you'll need to send the MIDI out to controller number 21, not 20, to change the brightness, and not the column height of the LEDs.

