 Loading... Please wait...
Sign up for our newsletter
You can also follow us on twitter.
Our Newsletter
Multiple VMeter control of faders in Sonar X1
This tutorial will demonstrate how to setup multiple VMeters to control track faders in Cakewalk's Sonar X1. If you just have one VMeter, you can follow these instructions, as well.
This tutorial is done using Windows 7.
Note: Some programs seem to have difficulty discriminating between multiple VMeters on Windows 7, Sonar included. The latest firmware version changes the USB device name when you change the channel. Be sure to get the latest config utility, also.
In Windows XP, USB MIDI devices will always show up as "USB Audio Device". It may not be necessary to change the channel numbers as shown below.
Sonar Limitations: Sadly, Sonar does not send MIDI controller data for generic MIDI devices (like the VMeter) that are "remote mapped" back out. This means automation data will not display on the VMeter's LEDs. We're working on finding / writing some bridge software to let the VMeter emulate a Mackie Control Surface, which is what many of the iPad / android control applications do to enable bi-directional communication.
VMeter Setup
As mentioned in the above note, Sonar can't differentiate between multiple VMeters in Windows 7. Sometimes it will correctly show the devices, but it behaves inconsistently. The latest VMeter firmware changes the root level USB device name when you change the channel, solving this problem. You don't need to upgrade anything if you're just using one VMeter.
Configure VMeter(s) to have only one controller output enabled.
- Plug in only ONE VMeter.
- Launch the config utility. (make sure you have the latest version!)
- First open MaxMSP runtime program
- Then open the config utility
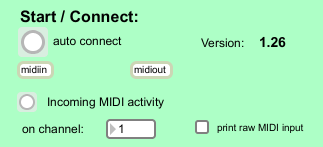
- Click "Auto Connect", and verify that the device version is displayed.
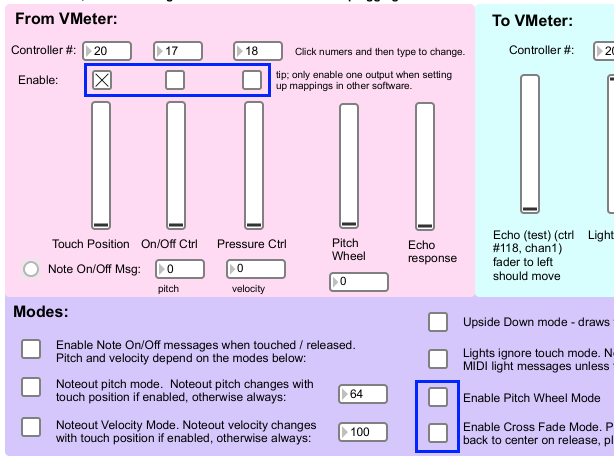
- Make sure only ONE output is enabled. This includes pitch bend outputs. Only one of the check boxes in the blue outlines shown below should be enabled. This is done so the Sonar "learn" process can find the right controller number.
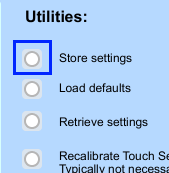
- If you made any changes, click "Store Settings."
- Repeat the above steps for the 2nd VMeter:
- Unplug the first VMeter
- Plug in the 2nd VMeter
- Launch config utility
- Click "Auto Connect"
- Make sure only one output is enabled
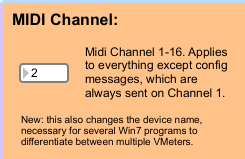
- Now, change the channel number on the 2nd VMeter. This will enable Sonar to differentiate between the two VMeters.
- Click "Store Settings" so the settings are retained after the VMeter is unplugged.
- Finally, unplug the VMeter and replug it so Win7 detects the new device name.
Sonar Instructions
- Plug in both VMeters before launching Sonar. If you recently changed the MIDI channel on either VMeter, make sure you unplug and replug so Win7 will detect the new device name.
- Launch Sonar
- Open Preferences, and enable the VMeter MIDI controllers
- Edit Menu --> Preferences
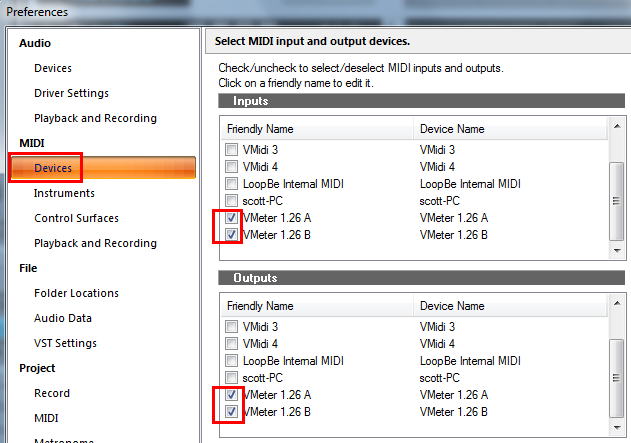
- Click the "Devices" Section under MIDI.
- Check the VMeter checkboxes under the Input and Output sections.
- In our example, the first VMeter has a MIDI channel of 1, and the 2nd VMeter has a MIDI channel of 2. Setting the channels this way causes the VMeter USB Device names to become A and B.
- Note: if you don't see 2 VMeter devices with different names in both the Input and Output sections, try disconnecting and reconnecting the VMeters while Sonar is open.
- Close the Preferences window.
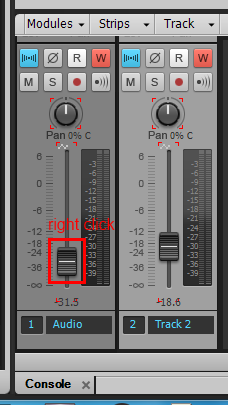
- In this tutorial, we've made two audio tracks, and are going to use VMeter A to control track volume A, and VMeter B to control track volume B.
- Open up the console window if it's not already visible by pressing Alt+2.
- Right click on the fader for track 1, and choose "Remote Control...".
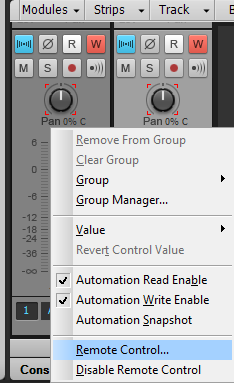
- Touch VMeter A
- Then click "Learn" in the Remote Control window. Clicking "Learn" uses the last MIDI input to set the parameters.
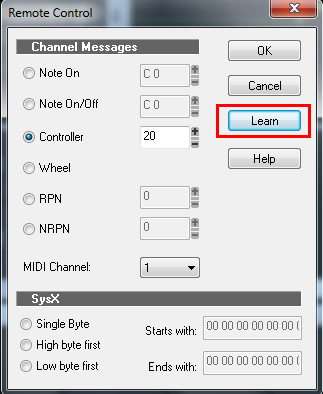
- Make sure 20 is displayed in the controller (or whatever controller number you have the VMeter set to output). Also take note of the MIDI channel. When you repeat this process for the 2nd track, the channel should be different.
- Click OK.
- Now repeat this process for the 2nd track and VMeter.
Using Multiple Outputs from One Vmeter
- Make sure only one VMeter is plugged in.
- Run the config utility to enable only one output (position, for instance).
- Quit the config utility, and start Sonar.
- Map the remote control as shown above.
- Quit Sonar, and restart the config utility.
- Enable the 2nd output (pressure), and disable the position output.
- Quit the config utility, and start Sonar.
- Map the 2nd output as desired.
- Finally, do one more round restarting the programs to enable both outputs in the config utility, and then relaunch Sonar.
- Note: you can avoid some of the restarting if you simply manually enter the controller number into Sonar.

